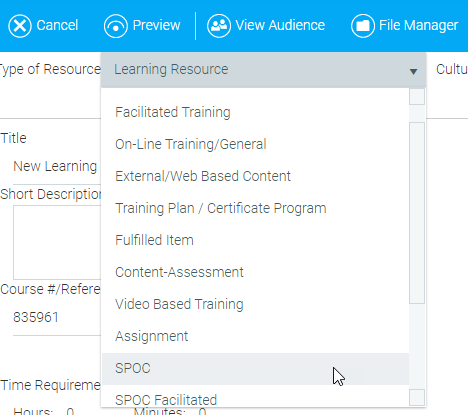
To create a Small Private Online Class, go to Resources > Maintain Learning Resources, in the Navigation Bar of the Administrator's Console. Click the New button in the top toolbar. In the Type of Resource drop-down at the top of the Overview tab, select SPOC.
Enter a resource title, provider, etc. See The Overview Tab for detailed information. If desired, enter a short description. This short description will display to users on the SPOC's Course tab.
Select Certificate as the media type. On the right side of the screen, you will now see additional options that are not present for other resource types.
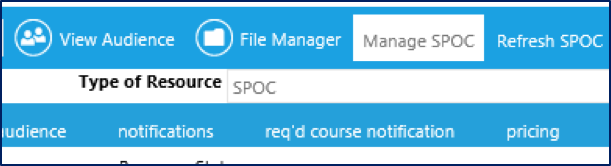
To add the resources that will comprise the SPOC, click the Manage SPOC button in the top toolbar.
A pop-up window will ask if you want to create a certificate. Click OK. The Administer Curricula screen will open up.
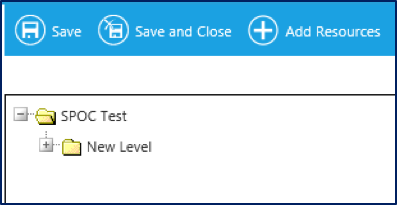
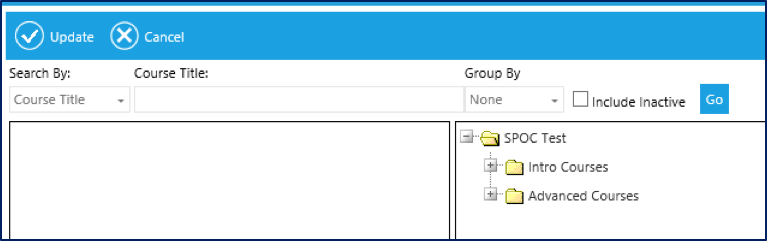
The top folder is the name of the SPOC resource. This cannot be changed on this screen. The next level folder will initially default to “New Level.” This name will be visible to learners, and you should change it.
Right-click on the New Level folder and select Edit Curricula Level from the context menu to change the name.
To add more folders at this level, right-click on the top level folder and select Add Curricula Level from the context menu. Repeat the above steps until the structure of your SPOC is complete.
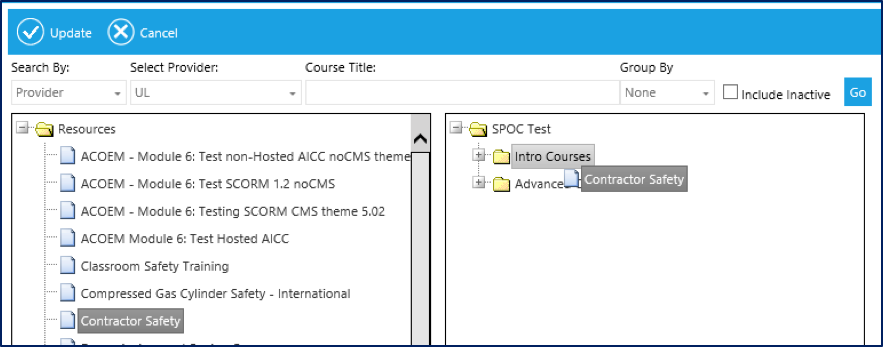
Click the Add Resources button in the top toolbar to begin adding courses to the SPOC. The Add Resources pop-up window will appear.
Use this window to search for existing resources to add to the SPOC.
Select what you wish to search by (e.g., course title, media type) and type the keywords into the search box at the top of the window. Click the Go button to see a list of results in the left-side panel.
Drag and drop the resources you want from the list on the left to the appropriate curriculum level on the right.
When all courses have been added, click the Update button in the top toolbar. You will return to the Administer Curricula window.
Newly added resources will default to the Required status, as indicated by the red R on the resource icon. If desired, a resource can be optional within the SPOC. To change the resource status, click on the resource title in the Administer Curricula window. The resource details will display on the right side of the screen.
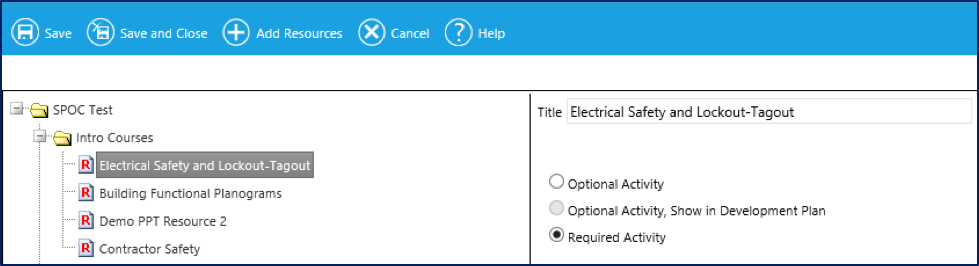
Select the radio button next to Optional Activity to change the status. The red R will disappear from the resource icon indicating that the requirement for this resource has been removed.
NOTE: Removing the requirement is an administrative action only. The learner view of all courses, both optional and required, will be the same. All resources within the SPOC must be completed for the system to automatically mark the SPOC complete. If desired, an administrator can manually mark a SPOC complete once all of the required elements have been completed.
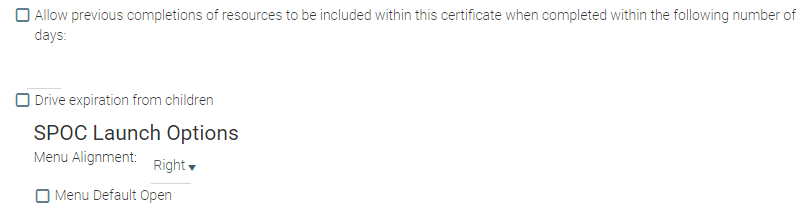
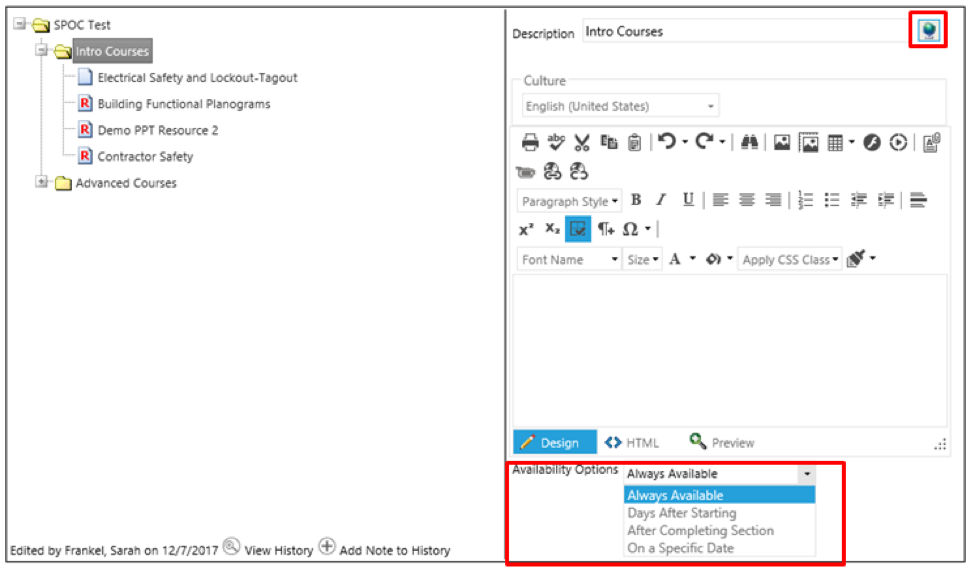
The curricula levels within a SPOC can be defined so that specified levels are locked until designated rules have been met. To define these rules, click on a SPOC level in the Administer Curricula window. The rule options will be displayed on the right side of the screen.
Several fields are available to edit on this screen.
Optional/Required Activities
If this section contains more than one optional resource, you can set a requirement for the completion of some of these resources.
For example, if a section contains three optional resources and a “2” is entered in this field, the learner will need to complete two of the three optional resources in order for the SPOC to be marked complete.
The following options can be used to control when learners can access each section within a SPOC.
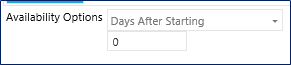
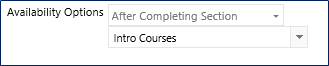
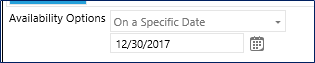
If a learner tries to launch a course within the SPOC that is not currently available, a pop-up box will alert them that they are not yet able to access that course.
When the SPOC set up is complete, click the Save and Close button in the top toolbar to return to Maintain Learning Resources.
Remember SPOC is a type of resource, so all other set up tasks – required audiences, notifications etc – are the same for a SPOC as for any other resource type.
In many ways a SPOC is similar to a certificate resource type. If a learner completes all resources within a SPOC, the system will automatically mark the learner complete for the entire SPOC.
If some resources within the SPOC are elective, and the learner chooses to not complete those resources, then the administrator will need to manually mark the learner complete on the Manage Credit and Enrollment screen.
Manage Announcements and Discussion Tabs